Friday, 19 June 2015

Project 'Flora'

Hi everybody :)

So we have shifted to a new place now. And all these white walls are like blank canvas for me :D So 'Something Different' decided to add more colours to this place.

For past few days I had been working on a project, which I called 'Project flora'. Its a series of colour-penciled drawings of different flowers. I had referred to some internet photos and sketches to make these drawings.

This is how project flora evolved:

#1 Started the series with beautiful tulips 


#2 'Lilies'


#3 Lovely Carnations


#4 Elegant hanging flowers called 'Fuschia'


#5 Ended the series with bright red Plumeria flowers

Once all drawings were finished, I framed them using normal thermocol sheet and white gelatin paper.
And now Project flora is all ready and up on the wall. Here is the final look :)


Thumbs up!! :) Very happy with the result. What do you say?? You too can try something like this and brighten up your home with lots and lots of colours.

Stay connected for more crafts from 'Something Different'!!!

You can also find us on 


Wednesday, 10 June 2015

Tutorial : An easel greeting card

Hello folks, hope you all are doing well. Today 'Something Different' has brought for you another greeting card tutorial. In this tutorial, we will learn how to make an easel greeting card. 


Steps are quite simple. 

Step 1: For this card, I have selected colour combination of Pink, White and black. Choose coloured paper sheets as you like. Cut pieces out of these sheets with dimensions:

Pink : 1) 12.5 cm x 11 cm 
         2) 12.5 cm x 18 cm
       3) 12.5 cm x 3 cm

Black : 1) 11.8 cm x 8.5 cm
          2) 11.8 cm x 2 cm

White : 1) 11 cm x 8 cm 
               2) 11 cm x 1.2 cm


Step 2: Make design as per your wish on first white paper piece. And paste it on first black piece and then again on first pink piece as shown below. This forms Part A of our easel greeting card.


Step 3 : Now, take second pink piece. Make folds at distances of 2 cm and 7 cm from one of the short edges. This is Part B of our card. 


Step 4: Write your short message on second white piece. And paste it on second black and third pink piece as shown.


Step 5: Paste the message strip that we prepared in step 4 along the short edge of Part B as indicated in the image below.


Step 6: Now, on the back side of Part A, mark a line at a distance of 6 cm from bottom long edge. 


Step 7: Apply glue to the 2 cm fold of Part B.


And stick part B to part A in such a way that 2 cm fold-line matches with the line marked on Part A in step 6. 


There you have it. A beautiful easel card is ready.


And if you fold it, both parts will perfectly stack over one another.


Write your message inside. You can customize this card in every possible way. You can change the colours, design, shape and size; basic procedure remains the same. 


Hope you enjoy making this card. 'Something Different' would love to hear your feedback. 

You can also find us on 

Thank you :) Cheers!!


Thursday, 23 April 2015

Domino's garlic breadsticks' box turned into a fancy jewellery organizer!!! :D

Hi peeps!! Hope you all are well :) I know, I know, this blog has been quite inactive for a while, and I am reallyyyy sorry about that. But now 'Something Different' is back in action with this new tutorial : a Jewellery organizer box!!

This is one also 'best out of waste' kind of project. Mother's day is coming up, so this could be a great project for kids too to do during their summer holidays. You can make any other kind of organizer, say for your stationery accessories or say crafting tools, following the same steps.


Here we go :

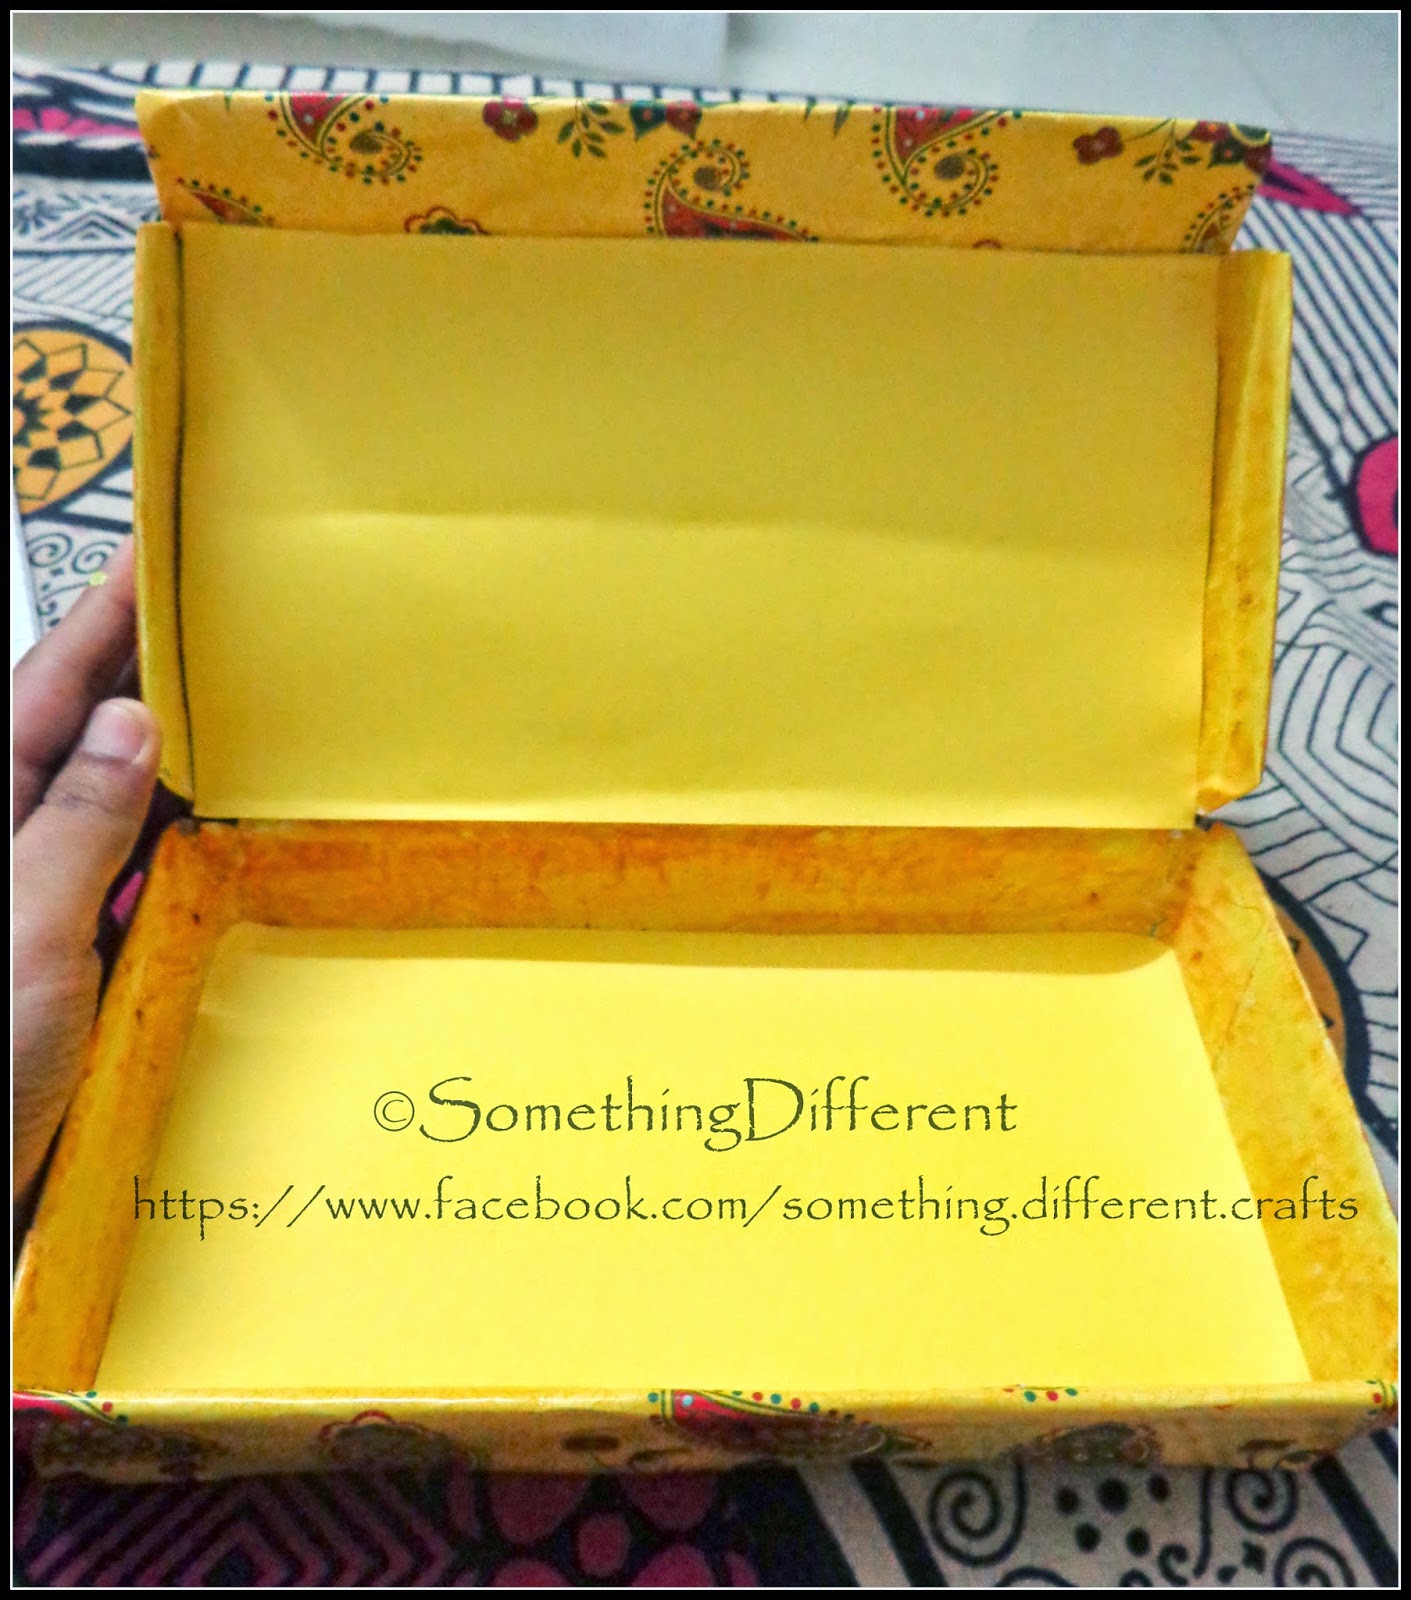
Step 1: As I mentioned, this is a 'best out of waste' project. So the basic box that is used here is actually a 'Domino's garlic breadsticks box' :P :D First step would of course be 'cleaning the box' well.


Then I stapled those little flaps in back, so that we get a proper rectangular box.


Step 2: I have white paper sheets to cover the box (and later colored them), but you can always go for colored paper sheet, if you like.
First I covered the edges of the bottom part of box as shown in pictures below.


Edges of the upper part are little angled (not perfect straight lines). I covered this edges as indicated below.


So you box will now look like this.


Step 3: There are two tiny flaps coming out on the top cover of the box.

Cut those off. That will give better flexibility while opening and closing the box.


Step 4: And then cover rest of the interior portion of the box as earlier.


Step 5: For the outer side of the box, I have used this pretty wrapping paper sheet. It has a nice, elegant design and I guess that goes well with our 'jewellery box' concept. If you wanna make any other kind of organizer, you can choose the outer cover accordingly.


Step 6: Then I colored the interior white portion with acrylic colors of shades matching with the cover and then I pasted pieces of a card board paper sheets to give it a neater look.


So that's how the box is decorated. Now we can start making inner compartments.

Step 7: You can make any number of inner compartments as you wish. Procedure will be as below:

Here I wanted to make 15 cm x 7 cm x 3 cm box. For that, I took a rectangular piece of size 21 cm x 13 cm. and marked lines at distance of 3 cm from each edge. (That is going to be height of that box.)


Step 8: Cut and fold along the lines as shown.


Step 9: Apply glue to the overlapping flaps. And your first inner compartment is ready. Simple, isnt it?

In a similar fashion, you can make rest of the compartments of different dimensions. Make sure they fit in the jewellery box well.

Step 10. Arrange the boxes and put your jewellery knick-knacks in it and there you have your pretty pretty jewellery box!!!


Why throw away the boxes, if you can make such cool things out of them!! So people, enjoy your Domino's garlic bread and then make something useful and beautiful out of it... Something Different!! :)

You can also find us on 

Wednesday, 18 March 2015

3-D, Pop-up Birthday card : 'Happy Birthday Mom'!!!

Hello everybody, good to meet you all after a long time. After a wonderful 'valentine's day special' series, 'Something Different' has brought for you another tutorial of making a cute pop-up, 3-D birthday card. Actually my mom's birthday is nearing, so I have prepared this card specially for her. <3


Here goes the tutorial :

Step 1 : Take a rectangular piece of white drawing paper of size 11 cm x 30 cm.

Step 2 : Mark all the lines as shown in image below, at given distances.


Step 3 : Cut along the dark straight lines only. Fold lines shown by (-----) in outward way (i.e. towards you). And fold lines shown by (---x----x---) inwards away from you. This is most important step. So make sure you make appropriate folds along the drawn lines only and not the rest of the card area.


Result will look something like this.


Step 4: Paint painted tiers of cake on a different sheet. Each tier has a size little bigger than our basic 3-D shape. (Alternatively, you can paint on the basic 3-D shape itself). Then paste the tier-cutouts on each of the steps of 3-D shape.


Step 5: Then decorate the card as you wish and write some sweet message on it. Taken another rectangular piece of pink drawing paper with size 12 cm x 31 cm. And then paste our 3-D card on it keeping some edge allowance.


Step 6: Make some simple decorations on the front side of the card. And there you have it! A sweet, simple looking, 3-D pop-up birthday card! :)


Happy crafting you guys!! :)

You can also find us on