Hiya all :) Hope you all wonderful people are doing great!!


Step 2 : Mark lines at distances as shown in image below.

Step 3: Draw a heart shape in the middle, having maximum length 11 cm and maximum width 12 cm.


Step 6: Now we are done with the drawing part. Lets pick up those paints and brushes!


Step 7: Now comes the 'cutting' part. Cut out along the heart shape as shown in the image below.


Then make folds along this lines (alternate in and out folds).


So in this way, base of the card is ready!

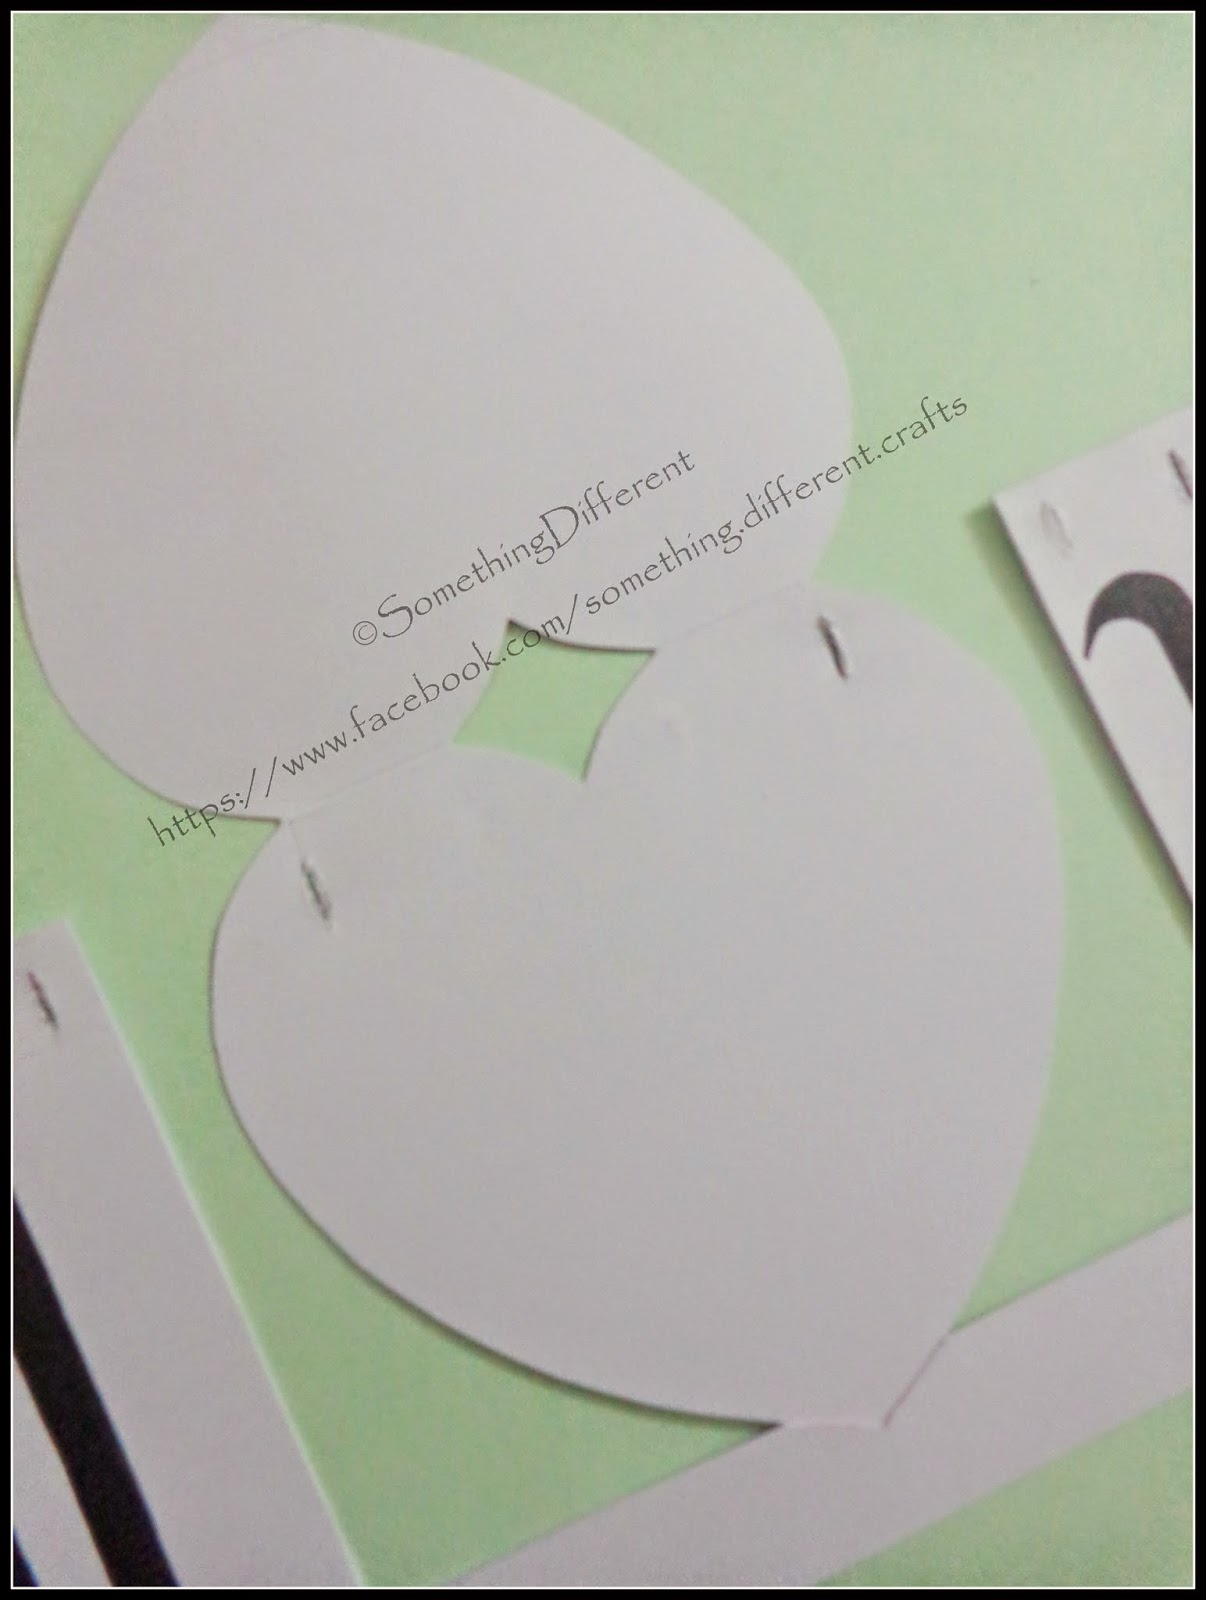
Step 10: Make slits in the card as indicated in the picture below.

Step 11: Take a golden (preferably) ribbon now. Pass this ribbon, alternately in and out, through all the slits.


This fifth tutorial from 'Valentine's Day Special' series is all about those three magical words that everybody loves to hear : 'I Love You'!! :)
Ready for the procedure?? Here it goes :
Step 1: Take a rectangular white drawing paper of size 27 cm x 24 cm. Fold it in half width-wise to get 27 cm x 12 cm card :
Step 2 : Mark lines at distances as shown in image below.
Step 3: Draw a heart shape in the middle, having maximum length 11 cm and maximum width 12 cm.
Step 4: I just love 'old English' fonts. That is why I chose to write 'I' and 'U' in that font. You can choose any font of your choice instead :)
Step 5: Fill up the heart portion with some nice, delicate design. If you wish, you can also try with fully red-color heart or some straight line design or you can paste your couple picture. <3
Step 6: Now we are done with the drawing part. Lets pick up those paints and brushes!
Step 7: Now comes the 'cutting' part. Cut out along the heart shape as shown in the image below.
Now cut the heart joint from the front page of the greeting card, so that we will be able to open this heart later!
Step 8: We are gonna make the base of the card now. For that, take another rectangular strip of size 27 cm x 6 cm. Mark lines on it at distances as shown in picture below.
Then make folds along this lines (alternate in and out folds).
Step 9: Stick first fold of this strip to the inside-bottom part of the front page of card. And stick the other small fold to the inside-bottom part of back page of the card. (Might sound confusing, but it is actually quite simple!)
So in this way, base of the card is ready!
Step 10: Make slits in the card as indicated in the picture below.
So by now, your card should look like this :
Step 12: Almost done now! Make sure the ribbon is tight enough (such that heart is perfectly balanced now, not toppling over) and make cute bows at both the ends of the ribbon.
Step 13: Write some lovely message inside that heart and there you have it!!! Your card is ready to convey your feelings to your someone special :) <3
Hope you all are enjoying this 'Valentine's Day Special Series' of 'Something Different'. Some more cool and interesting tutorials are on their way!! Stay connected!!
You can also find us on
Twitter: www.twitter.com/Smth_diff_craft
Pinterest: http://www.pinterest.com/smth_diff_craft/
Instagram: instagram.com/smth_diff_craft
Enjoy! Cheers!! :)
No comments:
Post a Comment