Hi peeps!! Hope you all are well :) I know, I know, this blog has been quite inactive for a while, and I am reallyyyy sorry about that. But now 'Something Different' is back in action with this new tutorial : a Jewellery organizer box!!
This is one also 'best out of waste' kind of project. Mother's day is coming up, so this could be a great project for kids too to do during their summer holidays. You can make any other kind of organizer, say for your stationery accessories or say crafting tools, following the same steps.


Here we go :
Step 1: As I mentioned, this is a 'best out of waste' project. So the basic box that is used here is actually a 'Domino's garlic breadsticks box' :P :D First step would of course be 'cleaning the box' well.


Then I stapled those little flaps in back, so that we get a proper rectangular box.

Step 2: I have white paper sheets to cover the box (and later colored them), but you can always go for colored paper sheet, if you like.
First I covered the edges of the bottom part of box as shown in pictures below.


Edges of the upper part are little angled (not perfect straight lines). I covered this edges as indicated below.


So you box will now look like this.

Step 3: There are two tiny flaps coming out on the top cover of the box.

Cut those off. That will give better flexibility while opening and closing the box.

Step 4: And then cover rest of the interior portion of the box as earlier.

Step 5: For the outer side of the box, I have used this pretty wrapping paper sheet. It has a nice, elegant design and I guess that goes well with our 'jewellery box' concept. If you wanna make any other kind of organizer, you can choose the outer cover accordingly.

Step 6: Then I colored the interior white portion with acrylic colors of shades matching with the cover and then I pasted pieces of a card board paper sheets to give it a neater look.
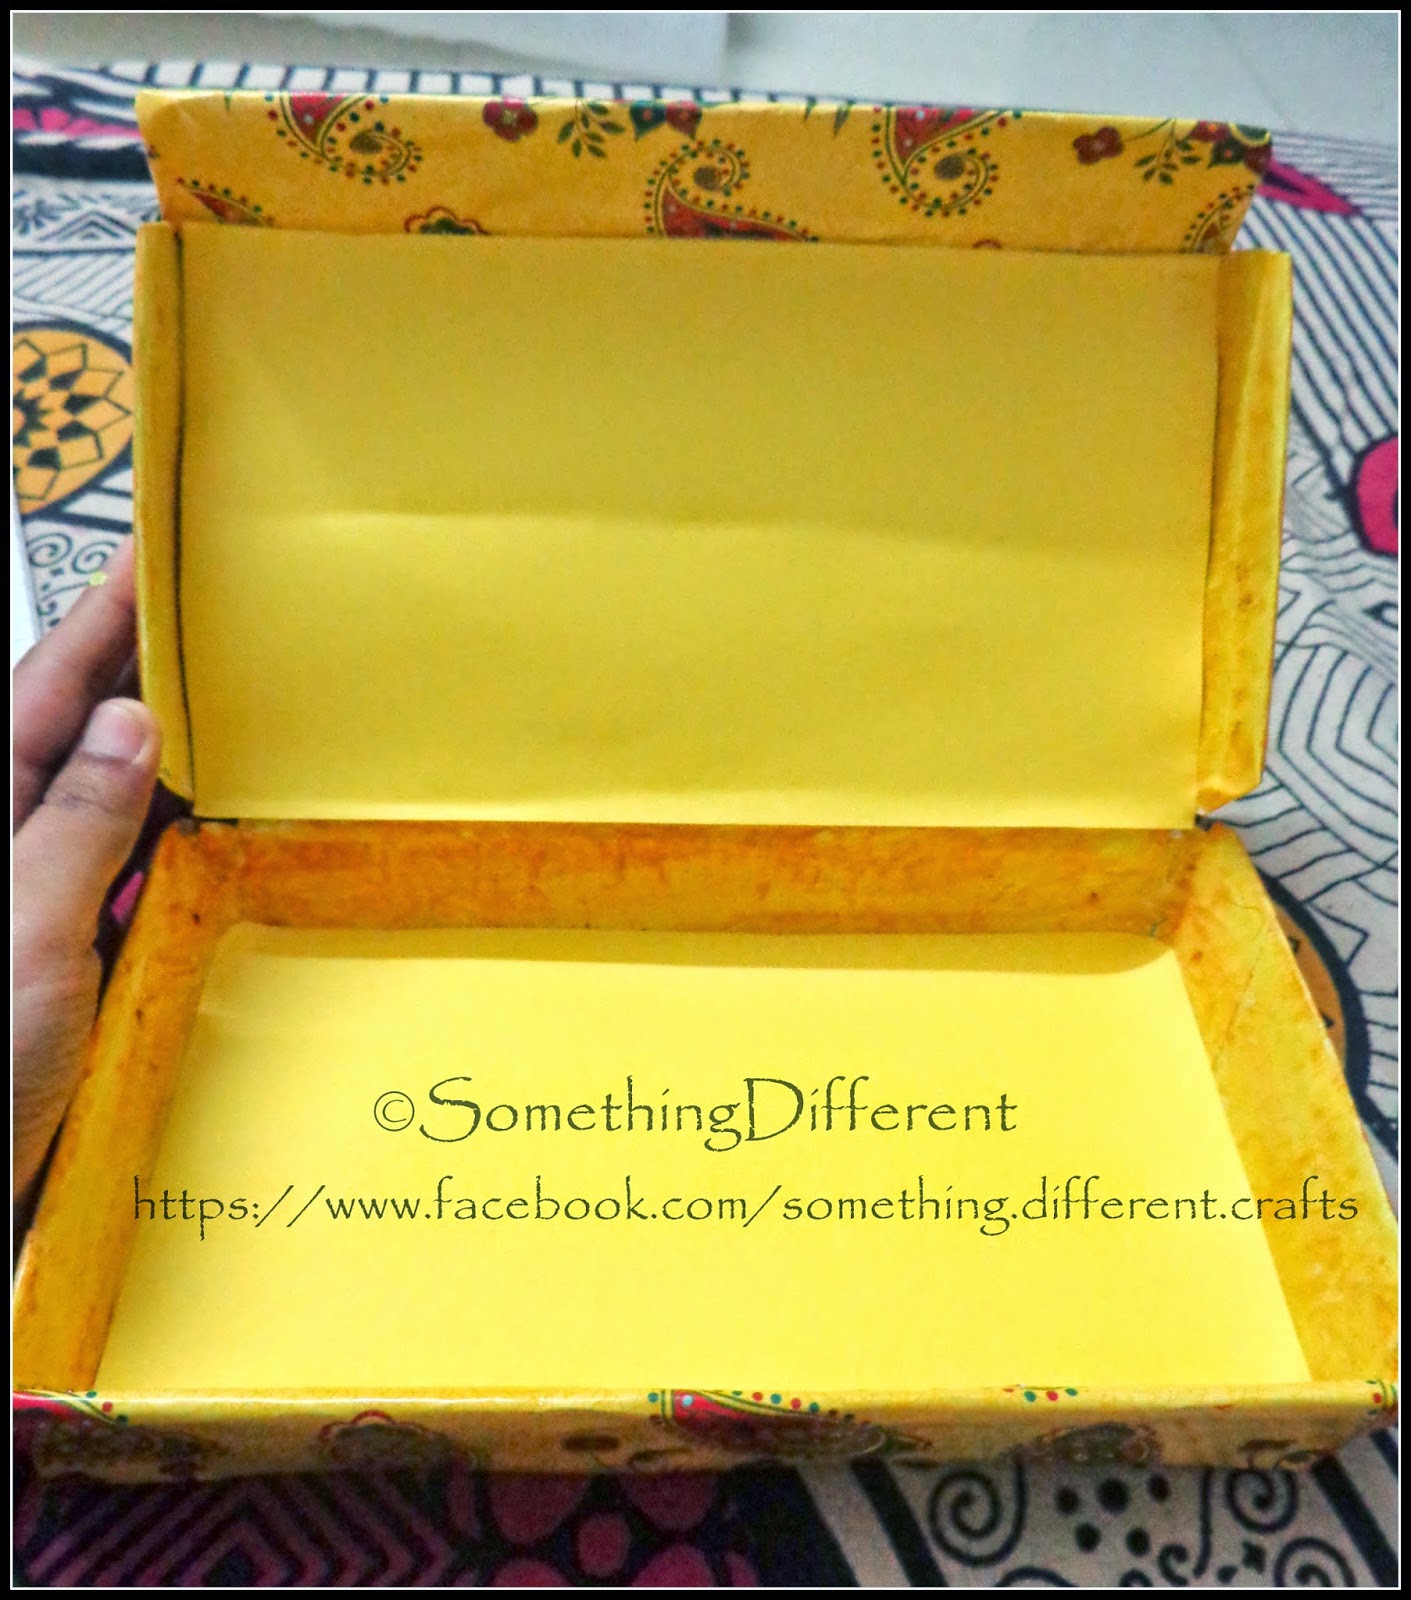
So that's how the box is decorated. Now we can start making inner compartments.
Step 7: You can make any number of inner compartments as you wish. Procedure will be as below:
Here I wanted to make 15 cm x 7 cm x 3 cm box. For that, I took a rectangular piece of size 21 cm x 13 cm. and marked lines at distance of 3 cm from each edge. (That is going to be height of that box.)

Step 8: Cut and fold along the lines as shown.


Step 9: Apply glue to the overlapping flaps. And your first inner compartment is ready. Simple, isnt it?

In a similar fashion, you can make rest of the compartments of different dimensions. Make sure they fit in the jewellery box well.
Step 10. Arrange the boxes and put your jewellery knick-knacks in it and there you have your pretty pretty jewellery box!!!
Why throw away the boxes, if you can make such cool things out of them!! So people, enjoy your Domino's garlic bread and then make something useful and beautiful out of it... Something Different!! :)
This is one also 'best out of waste' kind of project. Mother's day is coming up, so this could be a great project for kids too to do during their summer holidays. You can make any other kind of organizer, say for your stationery accessories or say crafting tools, following the same steps.
Here we go :
Step 1: As I mentioned, this is a 'best out of waste' project. So the basic box that is used here is actually a 'Domino's garlic breadsticks box' :P :D First step would of course be 'cleaning the box' well.
Then I stapled those little flaps in back, so that we get a proper rectangular box.
Step 2: I have white paper sheets to cover the box (and later colored them), but you can always go for colored paper sheet, if you like.
First I covered the edges of the bottom part of box as shown in pictures below.
Edges of the upper part are little angled (not perfect straight lines). I covered this edges as indicated below.
So you box will now look like this.
Step 3: There are two tiny flaps coming out on the top cover of the box.
Cut those off. That will give better flexibility while opening and closing the box.
Step 4: And then cover rest of the interior portion of the box as earlier.
Step 5: For the outer side of the box, I have used this pretty wrapping paper sheet. It has a nice, elegant design and I guess that goes well with our 'jewellery box' concept. If you wanna make any other kind of organizer, you can choose the outer cover accordingly.
Step 6: Then I colored the interior white portion with acrylic colors of shades matching with the cover and then I pasted pieces of a card board paper sheets to give it a neater look.
So that's how the box is decorated. Now we can start making inner compartments.
Step 7: You can make any number of inner compartments as you wish. Procedure will be as below:
Here I wanted to make 15 cm x 7 cm x 3 cm box. For that, I took a rectangular piece of size 21 cm x 13 cm. and marked lines at distance of 3 cm from each edge. (That is going to be height of that box.)
Step 8: Cut and fold along the lines as shown.
Step 9: Apply glue to the overlapping flaps. And your first inner compartment is ready. Simple, isnt it?
In a similar fashion, you can make rest of the compartments of different dimensions. Make sure they fit in the jewellery box well.
Step 10. Arrange the boxes and put your jewellery knick-knacks in it and there you have your pretty pretty jewellery box!!!
Why throw away the boxes, if you can make such cool things out of them!! So people, enjoy your Domino's garlic bread and then make something useful and beautiful out of it... Something Different!! :)
You can also find us on
Twitter: www.twitter.com/Smth_diff_craft
Pinterest: http://www.pinterest.com/smth_diff_craft/
Instagram: instagram.com/smth_diff_craft