Monday 9 February 2015

Valentine's Day Special!!! : 'I love you beary much!!'

And..... 'Something Different' is back again with another very simple tutorial from our 'Valentine's Day Special' series. It is a cutesy greeting card saying 'I love you bearyyy much' ;) <3


Not too complicated, not too time-taking and still a very cute card!! Here are the steps :

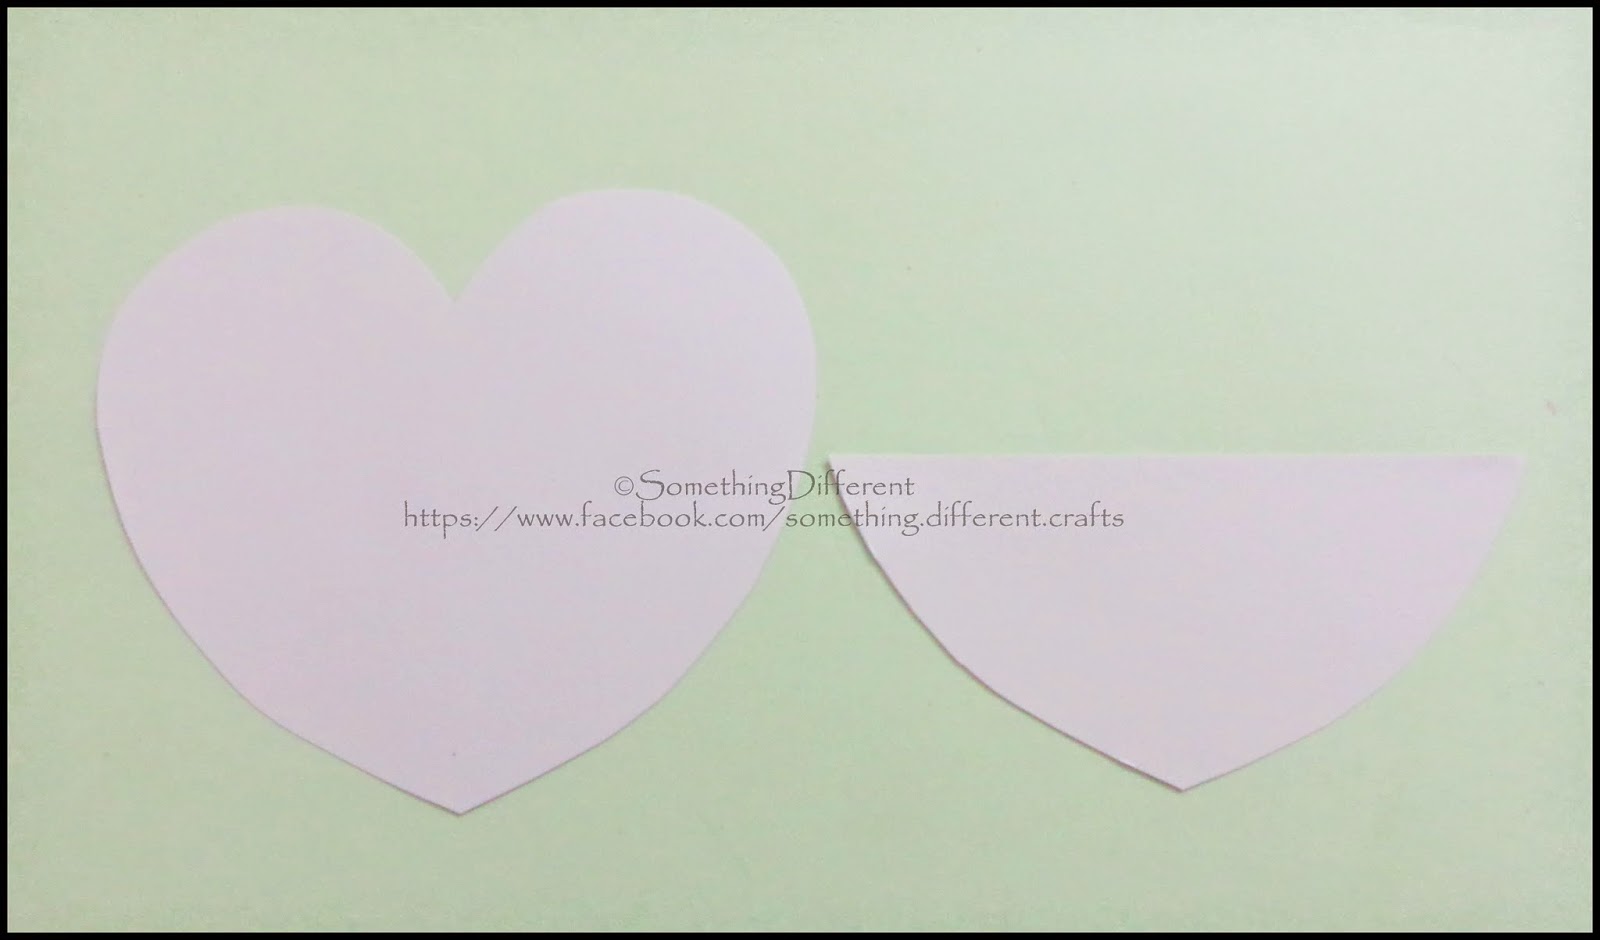
Step 1 : Cut out a heart (of size of your choice) from a white drawing paper or red one. Also make another cutout that is similar to the lower half part of that previously cut heart-shaped cutout. 


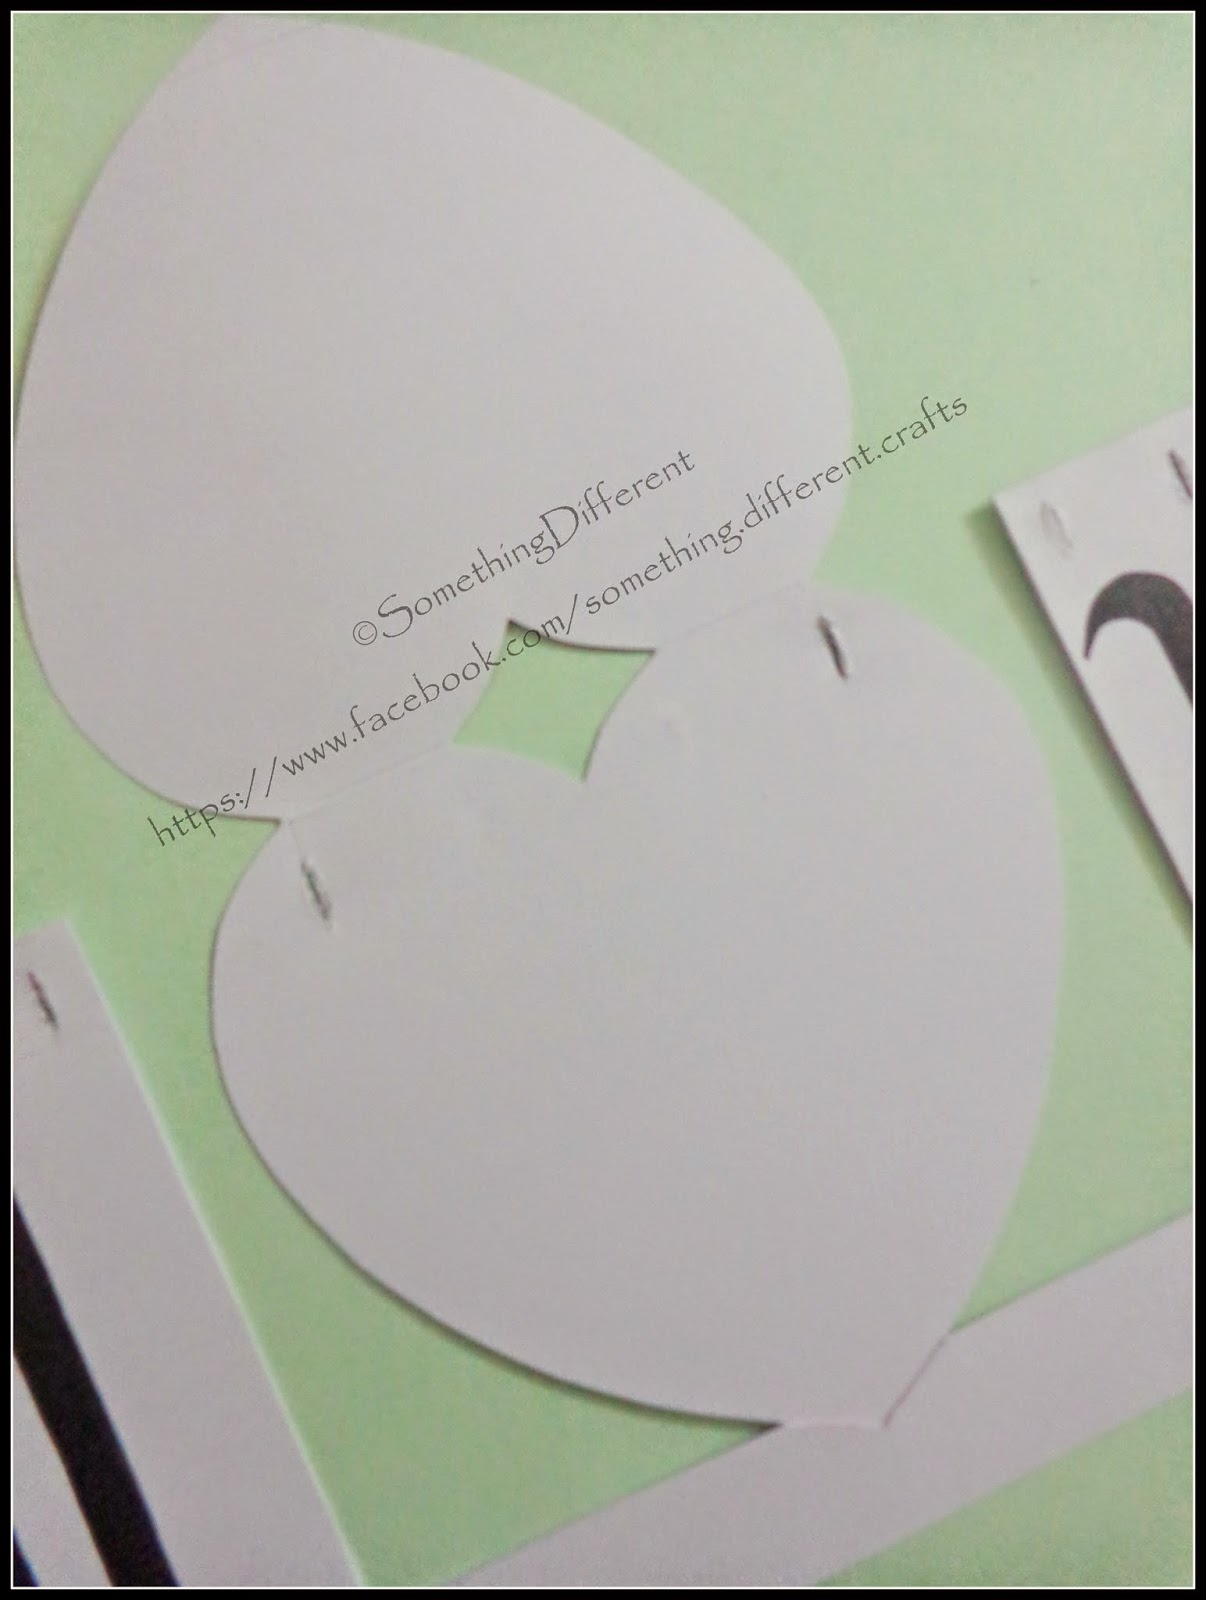
Step 2: Make few more cutouts for head of the teddy bear, its hands and feet as shown. Make sure they are in a right proportion.


Step 3: Paint all the cutouts.

Step 4: Apply glue to the edge of the backside of half-heart cutout. And paste it on the whole-heart shaped cutout such that their edges match perfectly. In this way, we will get a heart with small pocket in front :)


Step 5: Then paste the teddy parts appropriately. And the card is almost ready!!


Step 6 : Make a small rectangular card and write your love message in it. Put this card in that little pocket in the heart :) You can also decorate it with a ribbon bow (as I have done here). 

(Tip : Draw an outline of this ready card on another drawing paper. Cut it out. And then paste it on the backside of our card to give a nice finishing!!)


There you go!! 'I love you beary much' greeting card is ready!! 

I will see you soon with many more craft tutorials. Till then, buh-bye!! :)


Saturday 7 February 2015

Valentine's Day Special!! : 'Open your heart' gift box

Hi everybody!! Hope you are having a great weekend :)

Today 'Something Different' has brought something extra special for you as a part of our 'Valentine's Day Special Series'. Well, I have named it 'Open your heart' gift box!!! <3 :D


This lovely box has four compartments and hence it can be used to put together a bunch of little little valentine's gifts.
The tutorial is for a heart-shaped box of size 21 cm x 21 cm approximately. It has two semicircular boxes and two triangular boxes. Following are the steps :


Step 1: We will start with two semicircular boxes first. Each such box is made up of two parts A and B as shown. Cutout these parts having given dimensions from preferably red or pinkish drawing paper. Make folds along the marked lines.


Step 2: Apply some glue to part A along the circular edge and stick the rectangular strip to it around the edge as shown.

Finally it should look something like this :


Step 3: Take some satin ribbon and apply glue to it. Use it to connect part A with Part B.


That is it. One semicircular box is ready!


Repeat the same procedure for the second semicircular box.

Step 4: Now lets start with other two boxes. These boxes have three parts A, B and C as shown in image below.

Step 5: Make folds and make a partial cut in Part A as shown below :


Apply some glue to that overlapping flap and it will look like this.


Step 6: We need to make triangular slits in rectangular strip as we did previously for semicircular boxes. And make folds along the marked line.


Step 7: Now as earlier, stick this strip to the curved edge of part A.


Step 8: Repeat step 5 with part B to form lid of this box.

Step 9: Again using satin ribbon, connect both parts A and B together and the box it ready!!


Repeat the steps to make another similar box.

Step 10: Put all four boxes together and you will get a whole heart :) The final result will be like this:


I have carpeted the bottoms of each of the boxes to make it look neat. You can decorate it with some ribbon flowers etc. You can also make a heart-shaped base to which these boxes can be pasted so that they all stay together or just leave it like this.


Now you can put together your valentine's gifts in it and present this to your valentine with some romantic setting... you know candle, flowers, a greeting card and all!! ;)


Hope you liked today's tutorial. Stay tuned for more!! :)

You can also find us on 

Ciao!! :)


Wednesday 4 February 2015

Valentine's Day Special!! : 'Love is in the air' greeting card

Greetings from 'Something Different' :)

Happy to present to you this sixth tutorial from 'Valentine's Day Special' Series. This is a very simple and very very cute (at least I feel so :D) greeting card saying 'Love is in the air' <3 <3 <3


As I mentioned earlier, procedure is very simple. Lets get started then :

Step 1: Take a rectangular sheet of sky blue drawing paper having dimensions 28 cm x 12 cm. Fold it in half to have a card of size 14 cm x 12 cm.


Step 2: Cut out a heart shape and basket-like shape from white drawing paper as shown. And draw outlines to them.

Then paint both the shapes.


Step 3: Take small pieces of thermocol and stick them to the back of both these shapes.


Step 4: Paste both parts to main card. Those thermocol pieces will give nice 3-d effect to the card :)


Step 5 : Now glue threads as shown.

Step 6: Finally add some clouds, if you like and a sweet love message. That's all!! Our greeting card is ready to fly :D


Doesn't it look cute?? And as you can see, its very simple to make. Hope you will give it a try!! And I will see you again with more cutesy tutorials :) Ciao!!

You can also find us on 

:) :) :)

Valentine's Day Special!! : "I Love U" greeting card

Hiya all :) Hope you all wonderful people are doing great!!

This fifth tutorial from 'Valentine's Day Special' series is all about those three magical words that everybody loves to hear : 'I Love You'!! :)


Ready for the procedure?? Here it goes :

Step 1: Take a rectangular white drawing paper of size 27 cm x 24 cm. Fold it in half width-wise to get 27 cm x 12 cm card :


Step 2 : Mark lines at distances as shown in image below.


Step 3: Draw a heart shape in the middle, having maximum length 11 cm and maximum width 12 cm.


Step 4: I just love 'old English' fonts. That is why I chose to write 'I' and 'U' in that font. You can choose any font of your choice instead :)


Step 5: Fill up the heart portion with some nice, delicate design. If you wish, you can also try with fully red-color heart or some straight line design or you can paste your couple picture. <3


Step 6: Now we are done with the drawing part. Lets pick up those paints and brushes!


Step 7: Now comes the 'cutting' part. Cut out along the heart shape as shown in the image below.


Now cut the heart joint from the front page of the greeting card, so that we will be able to open this heart later!

Step 8: We are gonna make the base of the card now. For that, take another rectangular strip of size 27 cm x 6 cm. Mark lines on it at distances as shown in picture below.


Then make folds along this lines (alternate in and out folds).


Step 9: Stick first fold of this strip to the inside-bottom part of the front page of card. And stick the other small fold to the inside-bottom part of back page of the card. (Might sound confusing, but it is actually quite simple!)


So in this way, base of the card is ready!


Step 10: Make slits in the card as indicated in the picture below.


Step 11: Take a golden (preferably) ribbon now. Pass this ribbon, alternately in and out, through all the slits.


So by now, your card should look like this :


Step 12: Almost done now! Make sure the ribbon is tight enough (such that heart is perfectly balanced now, not toppling over) and make cute bows at both the ends of the ribbon.


Step 13: Write some lovely message inside that heart and there you have it!!! Your card is ready to convey your feelings to your someone special :) <3


Hope you all are enjoying this 'Valentine's Day Special Series' of  'Something Different'. Some more cool and interesting tutorials are on their way!! Stay connected!!

You can also find us on 

Enjoy! Cheers!! :)